

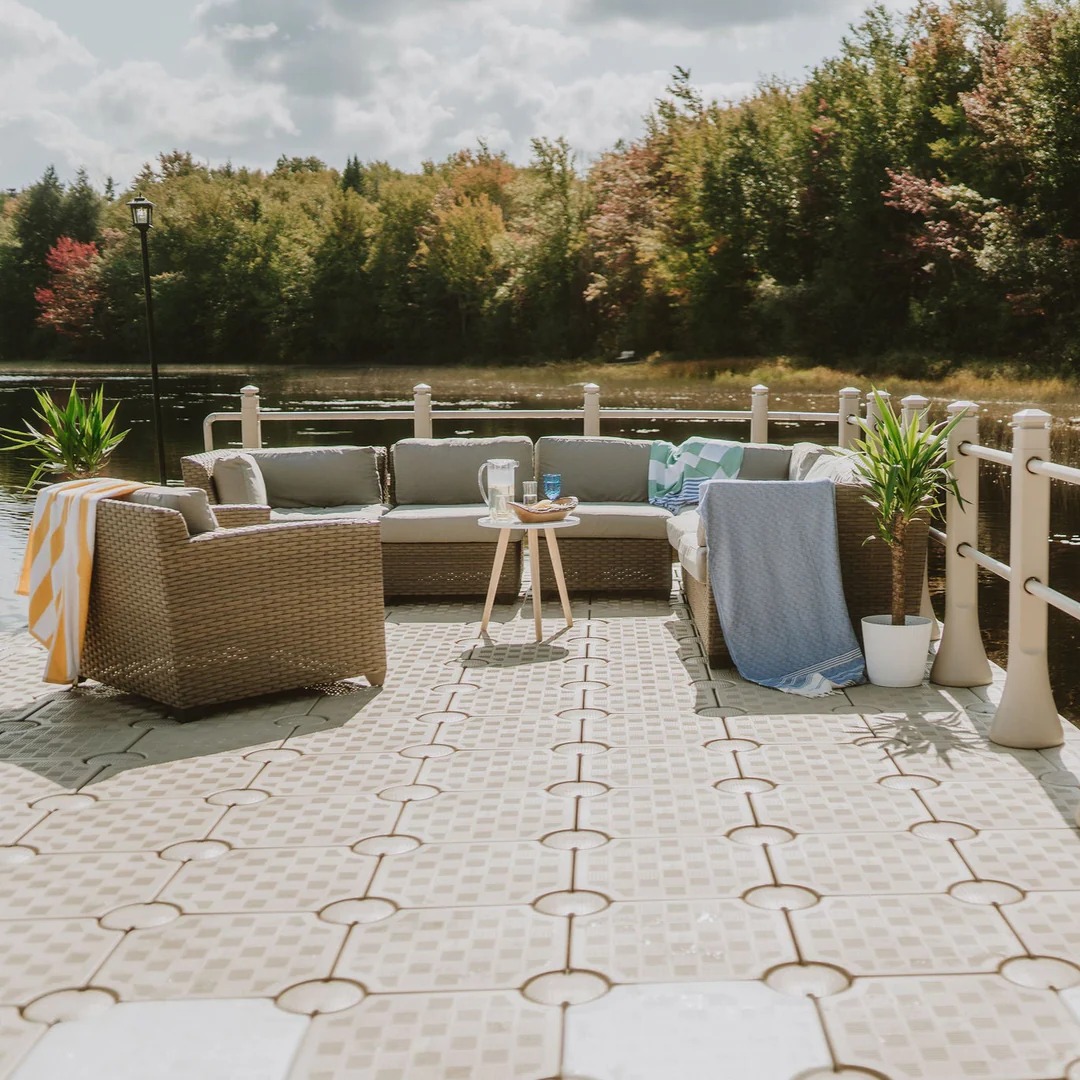
Installing a floating dock may seem like a complicated project, but modern modular systems are designed to make the process much simpler. With the right components, preparation, and installation method, many homeowners can assemble their own floating dock without specialized construction equipment.
Candock’s modular floating dock system is specifically designed for quick and flexible assembly. The G2 Cube forms the foundation of the system, while connecting pins, sliding nuts, spacers, edge cubes, and anchoring components allow you to create a configuration adapted to your waterfront.
This guide explains how to install a Candock floating dock, from planning and assembling the sections to positioning, anchoring, and completing the installation.
Before You Install Your Floating Dock
Before assembling your dock, take some time to evaluate the waterfront where it will be installed.
Consider the following:
- Water depth and seasonal water-level changes
- Shoreline conditions
- Water currents and wave exposure
- The type of lakebed or seabed
- Where the dock will connect to the shore
- The size and configuration of your dock
- How boats, kayaks, or personal watercraft will access the dock
Your anchoring system should be selected according to the specific conditions of your waterfront. Candock systems can be anchored using different methods depending on the site, including connections to shore structures and anchoring systems designed for different types of seabeds.
What You Need to Install a Candock Floating Dock
The exact components required depend on the size and shape of your dock.
A typical Candock configuration can include:
- G2 Cubes – the main floating modules
- Edge Cubes – for creating a finished perimeter
- Connecting Pins – used to connect the cubes
- Sliding Nuts – used with the connecting pins
- Spacers – used to maintain proper alignment
- Anchoring components – selected according to the waterfront conditions
- Optional accessories such as ladders, gangways, cleats, or watercraft docking systems
The G2 Cube is the main building block of the system. Each full cube measures approximately 48 × 48 cm and has a floating capacity of approximately 68 kg per cube.
The Connecting Pin works together with the sliding nut to secure adjacent cubes and create a strong modular structure.
Explore the Candock Connecting Pin
Step 1: Plan Your Floating Dock Configuration
Start by determining the size and shape of your dock before putting any components together.
Candock’s modular system can be configured into many different layouts, including straight docks, L-shaped docks, T-shaped docks, U-shaped docks, and custom configurations.
Think about how you intend to use the dock.
For example, you may want:
- A wide platform for swimming and entertaining
- A long access dock for reaching a boat
- A dedicated kayak launching area
- A personal watercraft section using a JetSlide or JetRoll
- A combination of several of these applications
Planning the configuration before assembly will make the installation much easier and help ensure that your final dock works properly with the shoreline and your watercraft.
Step 2: Assemble the Dock Sections on Shore
Whenever possible, Candock recommends assembling dock sections on a flat surface on land before moving them into the water.
This makes it easier to align the components, install the connecting hardware, and inspect each connection before the dock is placed in the water.
Begin by laying out the G2 Cubes according to your planned configuration.
Make sure the connecting tabs overlap correctly between adjacent cubes.
Then install the connecting hardware at each connection point.
Candock’s modular connection system uses connecting pins, sliding nuts, and spacers to hold the cubes securely together.
Step 3: Connect the G2 Cubes
Once the cubes are positioned correctly, connect the sections using the appropriate hardware.
The Connecting Pin is inserted through the connection points and secured using the corresponding sliding nut.
View the Candock Connecting Pin
Make sure each connection is properly aligned before tightening the hardware.
Work systematically across the dock rather than connecting components randomly. This helps maintain the correct shape and alignment as the dock grows.
Candock’s modular connection system is designed to provide a strong connection between the individual cubes while keeping assembly relatively straightforward.
Step 4: Install the Edge Cubes
Once the main platform has been assembled, you can add G2 Edge Cubes around the perimeter where appropriate.
Edge Cubes provide a smoother and more finished outer edge for the dock. Their rounded profile can also make them particularly useful along areas where boats or personal watercraft will be moored.
Explore the Candock G2 Edge Cube
Edge Cubes can be installed on a G2 dock even after the dock has been in use for some time. Depending on the configuration, some reconfiguration may be necessary.
When installing Edge Cubes directly in the water, Candock recommends having two people involved, with one person potentially working from the water.
Step 5: Move the Dock Into the Water
Once the dock sections have been assembled and checked, they can be moved into position on the water.
This is one of the reasons modular floating docks are convenient: the system can be assembled in manageable sections rather than requiring an entire large dock to be constructed in the water.
For larger configurations, use multiple people to move the sections safely.
Do not attempt to move a large dock section by yourself if its size or weight makes it difficult to control.
Step 6: Connect the Dock Sections on the Water
After the individual sections are positioned on the water, connect them according to the planned configuration.
Depending on the size of the project, this can involve connecting multiple sections together to create the final dock layout.
Take your time during this stage and verify that the connections are properly aligned and secured.
For larger projects, having at least two people makes the process significantly easier and safer.
Step 7: Install the Anchoring System
Anchoring is one of the most important parts of floating dock installation.
A floating dock should remain properly positioned while still being able to move vertically with changing water levels.
The appropriate anchoring method depends on factors such as:
- Water depth
- Type of lakebed or seabed
- Water currents
- Wave exposure
- Seasonal water-level changes
- Distance from shore
- Whether the dock is connected to an existing structure
When installing shoreline anchors, it is important to allow enough flexibility for the dock to move vertically as water levels change. A rigid connection can place unnecessary stress on the anchoring hardware.
Anchoring to an Existing Structure
If your floating dock needs to connect to an existing structure, Candock offers solutions such as its Wall Anchoring system.
Explore Candock Wall Anchoring
This type of anchoring can be used when connecting the floating system to a sufficiently strong fixed or floating structure. The quick-pin design can make removing and reinstalling the dock more convenient.
The exact anchoring solution should be selected according to the structure and conditions of the installation site.
Step 8: Install Your Dock Accessories
Once the floating dock is assembled and anchored, you can add the accessories required for your specific application.
Depending on your setup, this may include:
- Dock ladders
- Cleats
- Gangways
- Benches
- Swimming accessories
- Kayak accessories
- Boat docking equipment
- Jet ski docking systems
For personal watercraft owners, the JetRoll is a drive-on docking system that can be integrated with a G2 floating dock.
The JetRoll uses adjustable urethane wheels and is designed to make launching and retrieving a personal watercraft easier.
Another option is the JetSlide Jet Ski Dock and Ramp, which can be integrated into a Candock floating dock configuration.
Step 9: Inspect the Entire Dock
Before using the dock, perform a complete inspection.
Check that:
- All cubes are properly aligned
- All connecting pins are correctly installed
- Sliding nuts and hardware are properly secured
- Edge components are correctly installed
- The dock is properly anchored
- The dock does not contact the bottom
- Gangways and ladders are secure
- Accessories are firmly attached
Candock recommends ensuring that the cubes do not touch the bottom of the water, as contact with the bottom can potentially damage the cubes.
Can You Install a Candock Floating Dock Yourself?
Yes. Candock states that its floating dock systems can be installed by the owner, and installation instructions and the necessary tools are provided with the system.
However, Candock recommends having at least two people involved rather than attempting a large installation alone.
Many homeowners choose to handle the assembly themselves, while others prefer to have their distributor provide professional installation services.
The best option depends on the size of your dock, the complexity of the site, and your comfort level with waterfront installation work.
Do You Need to Enter the Water During Installation?
In many installations, most of the work can be completed without entering the water.
Assembling the dock sections on land is one of the easiest ways to simplify the installation process.
However, the anchoring method can affect this. Certain anchoring configurations may require someone to enter the water or dive to install or secure the anchoring components.
For this reason, the installation plan should be established before the dock is assembled.
How Long Does It Take to Install a Floating Dock?
The installation time depends primarily on the size and configuration of the dock, the number of people involved, and the complexity of the anchoring system.
A small modular dock can be assembled relatively quickly, while larger L-shaped, T-shaped, or U-shaped systems require more time because of the number of components and connections involved.
The modular design can nevertheless simplify the process because large docks can be divided into manageable sections and assembled progressively.
What About Winter Storage?
If you live in an area where lakes freeze during the winter, winter storage should be considered before installing your floating dock.
Candock does not recommend leaving the dock in the water over winter in areas where ice can create significant movement.
While some customers leave their docks in the water on relatively quiet waterfronts, Candock notes that the cubes are not guaranteed against ice breakage. The movement of ice during spring thaw can be particularly problematic.
If your lake freezes, consult your Candock distributor about the appropriate seasonal removal and storage procedure for your specific waterfront.
Why Choose a Modular Floating Dock?
One of the biggest advantages of the Candock system is that installation does not lock you into one permanent configuration.
Because the dock is made from individual modular components, you can modify the layout as your needs change.
You can:
- Expand the dock
- Reduce its size
- Change its shape
- Add Edge Cubes
- Add watercraft accessories
- Create additional swimming or recreational areas
- Adapt the configuration to changing waterfront activities
This makes the G2 Cube more than just a floating platform. It provides the foundation for a customizable waterfront system that can evolve over time.
Professional Installation vs. DIY Installation
Both approaches can make sense depending on your project.
DIY Installation
Installing the dock yourself can be an attractive option if you have a relatively straightforward waterfront, a manageable dock configuration, and several people available to help.
Candock’s modular design and installation instructions are intended to make owner installation possible.
Professional Installation
Professional installation may be preferable for large or complex docks, difficult waterfront access, challenging anchoring conditions, or homeowners who simply prefer to have the project handled by an experienced installer.
Your local Candock distributor can help determine the most appropriate installation approach for your property.
Install Your Candock Floating Dock With Confidence
Installing a floating dock doesn’t have to be an overwhelming project. With a modular system such as Candock, the process can be broken down into manageable steps: plan the configuration, assemble the sections, connect the cubes, move the dock into the water, install the anchoring system, and add your accessories.
The G2 Cube provides the foundation, while products such as the G2 Edge Cube, Connecting Pin, JetSlide, and JetRoll allow you to customize the dock around your waterfront activities.
For the best results, always consider your specific water conditions and anchoring requirements before beginning installation.
Ready to install your own floating dock? Contact Candock Montreal to discuss your waterfront, choose the right products, and determine the best configuration and anchoring solution for your property.